SUJI: pleating
Hand-pleating vertically along the length of the narrow and long bolt of kimono cloth (14 inches x 12 yards) developed into a technique in Japan. A thread winds around the hand pleated fabric to maintain the pleat pattern. Before dyeing, the entire pleated length is bound very tightly with thread in order to expose only the peaks of each pleat to the dye, resulting in vertically striped patterns.
There are ways to create a wide variety of designs by repeating the simple process of pleat and dye: changing sizes of each pleat or the binding intervals, or reversing the peaks and valleys of the folds. This traditional
suji technique is relatively easy to master and inexpensive to produce. Such fabrics were widely used in indigo-dyed cotton kimonos for the general populace and in silk under kimonos for the more privileged class.
For more information:
Here we go:
 |
| Some of these pictures are just down right....not right. | | |
|
|
|
First prep your fabric like you normally would with soda ash.
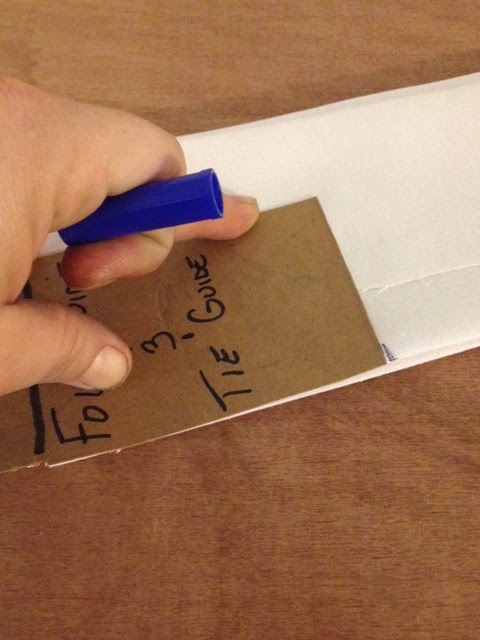
Make yourself one of these boogers. I usually fold the width of my hand, which is about 5 inches. You can make yours whatever size you want. This is to measure out an even fold allllllll the way down the length of your fabric.You want a uniform fold, this will make it easier.
IRON your folds. Yes, I totally said IRON. This is what keeps all your little details in check and keeps your folds....folded. Iron all the way down the LENGTH of the fabric. Don't try to cheat yourself on this one, don't just fold it over half way thinking it'll be less time. What will happen is 1. your pattern will radiate out from the center of the fold, creating an obvious fold on your fabric. The eye will automatically go to that fold. 2. You want your fabric to be as thin as possible. That's why this pattern looks so much different on T-shirts.The fabric is too thick to take in the tiny creases.
 |
| This is what mine looks like, but it's small for this tutorial. Notice the even crisp lines? |
 |
| This is what a king size sheet would look like. |
|
|
Turn your booger guide to the side and mark all the way down the fabric.
.....all the way down.
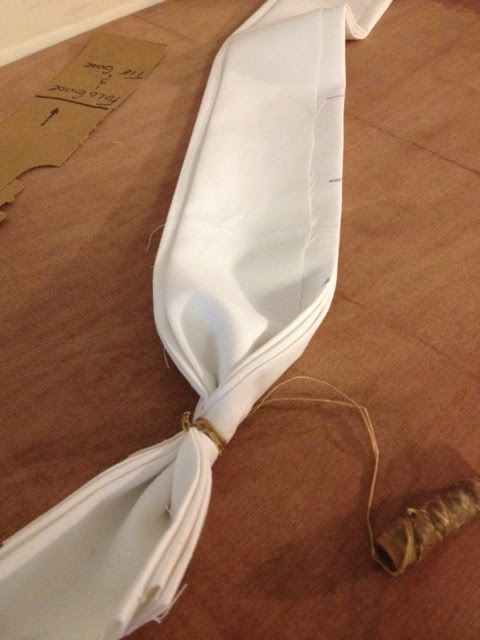
Every place you marked, tie off with Sinew, make it super tight! You can keep pinching up and wrap, or every other pinch it down. Not sure if that's making sense. I don't really keep up with this part. I just wrap and pull, wrap and pull. (super tight)
Should look something like this. After you're done with this step it's time to ICE DYE!!! WOOOHOOO!!!
Of course, I'm not a purist so I totally cheat on ice dying and I totally recommend you ice dye how you normally would. I do offer this one piece of advice, put some soda ash powder on your fabric before you lay your ice or powders.
 |
This is ice dyed in Indigo, using my cheater method.
Enjoy and Good Luck! Happy Dying! |


